


We all have should have a place where we can repair, build, or maintain our equipment and appliances. This is a workshop space for our projects, from the simplest like building a simple tool, to the most complex like rebuilding the engine of a classic car. The space needed can range from a small corner of your garage to a complete workshop facility for a fabrication or repair hobby or even a small business.
After forty-five years around engines and tools, I have come to the conclusion that every man needs his own workspace where he can develop his hobbies and train his sons and daughters in basic home and car maintenance.
MEASURING INSTRUMENTS
Measuring instruments allow us to take precise readings of the parts that we want to build. The two basic measuring instruments in a home workshop are the micrometer and the vernier caliper. Although other instruments exist, these are the most commonly used. While there are now direct-reading electronic versions, I suggest that you familiarize yourself with the analog versions, since batteries may not be readily available in a Stuff Hits The Fan (SHTF) situation.
The micrometer shown uses measurements in the metric system. But it is easy to find information online on to take readings in inches, when using an American micrometer.
Parts and reading of a micrometer
Figure 1 shows the parts that make up a micrometer.
These are:
A: FRAME.
B: ANVIL.
C: SPINDLE.
D: SLEEVE.
E: THIMBLE
USE OF THE MICROMETER
The screw on this instrument has a pitch of 1/2 millimeter. One turn of the thimble engraved on the sleeve equals 1/2 millimeter of the advance Two turns equals one millimeter the thimble is graduated in 50 parts, each 5 numbered as follows: 0,5,10,15,20,25,30,35,40,45. When 50 of these graduations have passed the horizontal line of the sleeve, one complete turn is achieved. Each graduation of the thimble is equivalent to one-hundredth of a millimeter (0,01)
An Aside: In the international system of units (S.I.) the comma indicates decimal numbers and the period indicates thousands. This is the reverse of what in used in America.
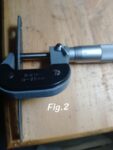
In Figure 2 we measure the thickness of metal plate, the we will observe how many division of the sleeve and which one coincides with the thimble.
In Figure 3 we observe that the líne is between the thimble mark corresponding to 0,44 and 0,45 but not reaching the latter.
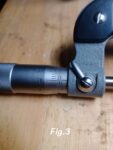
For taking our reading, we must add 0,5 which is the screw advance. Therefore, the reading Is:
T=1 + 0,5 + 0,44
T= 1,94
(We use the lower reading.)
BUILDING A CHAINSAW BAR SLOT CLEANER
Building your own tools is a simple pleasure. It not only boosts self esteem, but also prepares you for the future allowing you to develop skills that, in certain situations — such as an economic collapse, mass inflation, or supply chaín disruptions — will enable you to get ahead by using your abilities and reusing available materials.
TEMPLATE CONSTRUCTION
The only key starting data I had for this project was the tool’s length, which Is 4 inches –approximately 110 mm. The material thickness as 1,94 mm.
The shape is what we see in the photos, but since we lack the measurements, we will make an approximate figure. The measurements can can be found in the corresponding graphic.
First, we will make a diagram plan where we will dimension the tool. (See Figure 4.)
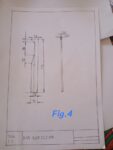
Note that the representation system used Is the European (ISO-E) system, so some may notice that the views are the reverse of the American system. All dimensions are in millimeters.
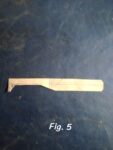
I made a cardboard model (Fig. 5) to transfer to the metal plate, using the dimensions from the diagram plan. Those readers who are experienced in metalworking can disregard the plan, but it allows one to remember the dimensions considered, or if someone wants to reproduce the tools and they can’t find the cardboard model. I don’t know why they tend to get lost, so keeping the diagram plan is always useful.
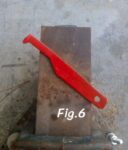
Once the model Is transferred to the metal, we use a metal saw to cut out the online, then with a bench grinder we round the edges and refine the tip. The smallest dimension of the chainsaw bar slots is 0,43 inches (1,1 mm). This tools should work for nearly all modern chainsaw bars. I recommend painting it in a bright color so that it is easy to locate. (See Figure 6.)
Read the full article here