
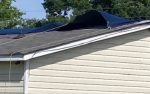
As we drove home from church this morning, signs of damage from hurricanes Debby and Helene were still abundant though the storms are now more that six months behind us. Since Debby, I have been watching for signs of repairs at a home where one corner took a tree strike that busted the roof wide open. Within the past week it appears someone has at last replaced the lightweight basic blue tarp with a heavier option, although the new one is only secured with roofing nails every 4-5 feet around the perimeter. Many of the remaining tarps are reaching the end of their service life or have been frayed or torn loose by the wind and not re-secured. As a result of witnessing roof damage so often while volunteering with disaster relief, I have put together an emergency roofing kit and hope to describe the contents and the reasons behind my selections herein.
Disclosure: I do not claim any of the repair techniques presented as being uniquely my own. I have learned much of what follows from fellow workers and occasionally solve new problems as encountered, but others were serving in the tarping ministry and developing practices long before I became involved.
By my experience, the repairable types of roof damage are those where only the weatherproofing layer (ie. shingles or metal) has been disrupted or those where isolated structural damage has occurred. Strong winds, hail, and unusually heavy rains typically cause the former, whereas tree damage is the typical cause of the latter.
In situations where a hole has been punched through the roof it may be necessary to cover the opening with lumber or plywood to support the tarping. For any hole smaller than two feet, a securely fastened tarp should be able to span the damage without a high risk of puddling over the damaged area due to the tarp sagging into the hole. For gaps between two and six feet, my preference is to secure inexpensive half-inch plywood across the break, ensuring the edges of the plywood lap the opening by a foot on each side. If the damage is substantial enough that plywood on its own will not suffice, I resort to sistering or extending the broken trusses/rafters with 2×4’s and 3” screws then running plywood over the temporary structure and surrounding edge of the damage.
While getting the hole covered as quickly as possible is important, properly securing the temporary roofing material (i.e. tarp) is vital to prevent having to repeat your efforts. Batten strips are one of the keys to successful temporary roofing. We generally use pre-cut ¾”x1-1/2” pine battens. These are available at the big box lumber yards as single pieces or on bundles of 8 to 12 pieces. The key to achieving a secure tarp has proven to be tightly wrapping the edges of the tarp around a batten – two or more wraps before fastening the roll to the roof. Experience has also shown that it is best to secure along the roof’s vertical edges with an overhand roll but to use an underhand roll for the horizontal spans. I may botch this explanation, but here goes:
By placing the batten atop any edge of the tarp that runs “up and down” the edge of the roof then rolling it into the tarp at least two wraps, you end up with the tarp material lying directly on the undamaged roof where it can be firmly fastened in place without a gap for wind to get under. Although the overhand wrap will work for horizontal battens, doing so creates as shallow dam because the roll itself acts as a barrier. If, however, an underhand roll begun by placing the batten beneath the tarp is used, the result is a small bump under the temporary roofing that most often acts as a ramp over which rain or snow can fully sheet.
Additional vertical battens should be attached about every three feet across the application. These will lie on the surface of the tarp and should extend to within a foot of both the roof peak and the lower horizontal battens.
If the horizontal span of the damage or area to be protected is wider than a single tarp, a second tarp can be used to complete the coverage. In this case, align the loose common edges of the two tarps with a batten then perform an overhand roll of the pair together to create a weather resistant seam. Fasteners driven through the roll will sandwich the materials and should prevent weather from getting under the joint from either direction. If the tarps are only overlapped, one direction will be susceptible to the wind or driven water could penetrate between the layers.
For best protection, the upper edge of your tarp should cross over the peak and be secured with underhand rolled battens 12-18 inches down from the peak. By using an overlap as described, the roof cap/ ridge vent is protected and there will be solid sheeting into which you can attach the batten. Trying to secure the top of the tarp on the damaged side provides an opportunity for precipitation to flow under your temporary measures and still enter the home since there will be a gap between the tarp and original roofing.
In situations where roof repairs were slow in coming, there has been loosening of the batten strips fastened with smooth shank nails. The culprit was usually twisting of the lumber due to exposure instead of wind. As a result, we now use either ring shank nails or 2.5-inch deck screws to secure batten strips. If at all possible, we avoid driving fasteners into undamaged sections of metal roofs. For traditional homes that have overhangs, we will extend the tarping below the fascia and screw the edges up into the soffit.
The practice of choice for metal roof mobile homes is to essentially wrap walls and roof together by affixing a wrapped batten in the seam between the bottom of the exterior wall and the top of the home’s underpinning. The temporary roofing is then carried up the first side, over the full roof and extended back down to the corresponding wall to underpinning seam on the opposite side. To seal off the unsecured edges I will drive a longer screw fitted with a wide fender washer (the washer is to keep the rope from slipping over the end of the screw when under tension) into the extreme edges of the tarping at the aforementioned seams, tie off a ¼-inch nylon rope, toss the loose end of the rope across the roof, install a corresponding washer and screw on the second side then tension and tie off the rope.
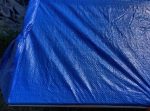
To aid in keeping the rope in place, it can be “taped over” across the roof using a quality duct or Tyvek construction type tape. I once heard about a variation on the rope method where multiple tie off points were installed and the finished crossings of a very long rope resembled the lacing of a boot. If care isn’t taken placing the cordage, wind can easily get under the tarp and displace it as shown in this picture.
When I first got into tarping, smooth blue poly in 10-mil thickness was the best product available. Around 2010 a string reinforced poly sheeting began arriving with our supplies. This material reminds me of rip stop nylon fabric in that it has a checkered pattern and will not tear. The checking also provides substantial traction when walked upon. I have used it in multiple colors (not that color matters) and suspect that it is also around a 10-mil thickness. It is no exaggeration that I have seen this material last for years. I gave remnants from a job in 2013 to my father to cover his firewood and he is still using those same pieces in 2025.
For years, I asked who made this material but no one I spoke with knew. Last fall a pallet we received for hurricane Helene relief listed the source as Eagle Industries of New Orleans. Looking for a source online where one could purchase a single roll led me to the website for First Place Supply Inc., in Houston, Texas. They have in their product catalog several Eagle Industry string reinforced types of poly sheeting in rolls 20 or 40 feet wide by 100 feet long. The product is not inexpensive but its durability will far surpass that of a woven blue plastic tarp.
On a related notes I was at the feed store earlier today and had a blinding flash of the obvious when I noticed all of the different-sized silage tarp rolls along the parking lot. These could be another option with easier availability if one needed temporary roof covering. The silage tarps I have used were significantly tougher and heavier than typical 6-mil contractor-grade poly used as vapor barrier in crawl spaces plus it is available in much larger sizes. Out of curiosity, I had the co-op price a couple for me, a 40 x 100 was $250 and a 40 x 150 was $375.
On occasions where we find climbing on the roof would be unsafe or if a long enough ladder is not available, we will pull the tarping over the home using ropes. Just as one would when trying to get a rope up into a tree to pull for cutting, a ¾ inch steel nut is tied to the end of a roll of masonry twine. The nut and string are thrown over the house and we hope it clears the gutters on the opposite side. Once retrieved, a set of larger lines are connected to the masonry twine and pulled back to the original side. Since the poly does not have grommets for tying to, the tarping is “bunched” around another of the steel nuts then the pull ropes are cinched and tied around the poly wrapped nut. This process is repeated for each end and the mid-length.
Given the hassles of tossing the weighted mason’s line, it is prudent to attach any necessary rope that will be left on the poly to substitute for battens before pulling the tarping across the damaged section of roof. Though not as permanent as fastened battens, this repair is better than nothing. One person can work back and forth to pull a large tarp over but more hands are better here, especially if someone on the tarp side has a long pole or 2×4 to push the tarp out from the roof edge as the tarp is drawn over.

The most unusual method I have seen for holding a tarp down was using sandbags. While in Pensacola several years ago, we drove by multiple homes where the tarping was secured as shown in the adjoining photo. I would not have thought of this but the folks in Florida are well-versed at hurricane recovery and creative in their solutions.
Anytime I have to get on a roof with more than a 5 in 12 pitch or the roof of a multi-story home, I wear a fall safety harness with a shock-minimizing safety lanyard. The lanyard is connected to a 5/8” diameter safety rope via a sliding/locking ascender. When the available length of set up needs to be increased, 30 foot long 2-inch-wide tow straps are connected to the primary safety rope using a rated carabiner. For the occasions where it is not possible to tie off to a tree or vehicle, a set of portable anchors is used. These were made by casting ¾” x 12” utility pole eyebolts into a trio of five-gallon buckets filled with concrete. The buried threaded end of each eyebolt was fitted with a large flat washer bound between nuts and lock washers to ensure the hardware can never pull out. When using these three they are linked together with doubled up ¼” diameter chain inserted through the eyebolt and tied off using another of the ½” diameter recovery shackles. Portland cement concrete weighs approximately 150 pounds per cubic foot so each bucket weighs around 100 pounds.
A common practice amongst professional roofers is to use foam pads to improve grip. Medium-weight upholstery foam in three or four-inch thickness cut into roughly 30-inch squares is my preferred material for shingle roofs. I have found that two-inch memory foam, especially that with a slightly tacky feel (such as some mattress pads) is better suited for metal roofs. It is also wise to have on sensible footwear. Shoes or boots with soft soles are best, whereas slip on boots with leather soles are dangerous.
Be aware of your foot placement on metal mobile home roofs and around structurally damaged or missing sections of any roof. There was a scary-funny event once where a volunteer made a mis-step and fell through the roof, was skinny enough that he missed the trusses on each side of the damage, broke through the ceiling drywall and fortunately had a soft landing on a bed. A safety suggestion regarding the patching process is to mark the tarp over the damaged area with spray paint so anyone who has to be on the roof in the future will have an idea of where not to step. Additional advice is to have a person on the ground “toe” any ladder when someone else is climbing on or off and ensure your ladder extends beyond the roof by three or four rungs, ie waist height from roof.
Before closing, I’m providing my list of emergency tarping supplies.
My emergency roof tarping kit consists of:
24 ea 1x2x8’ furring strips
6 ea 2x4x12’
2 ea ½ construction grade plywood sheets
Bright spray paint
5 Lbs of 2.5” deck screws
1 Lb of 3” deck screws
30 ct box of 3/16” x 1-1/4” flat/fender washers
Cloth nail apron
Cordless impact driver with T-25 bit for deck screws
3 pieces of 3” x 24” x 24” semi firm upholsters foam
1 roll of string reinforced poly, 20×100
2 ea 25×40 synthetic tarps
2 extension ladders
200 ft of ¼ inch nylon rope
20 green poly sandbags, unfilled
1- 500 ft masons’ nylon string line on a free spool handle
Several ¾” nuts to serve as throwing weights
Fall harness, lanyard and safety rope
Hurricane season starts next month. Tornadoes are proving that they can occur at any time of year while wind and rain cause trees to fall with every storm. I sincerely hope that no one needs the information above but if you do, then I hope it helps.
Thanks, as always, to the SurvivalBlog staff, for your hard work.
Read the full article here